Indice
Descrizione
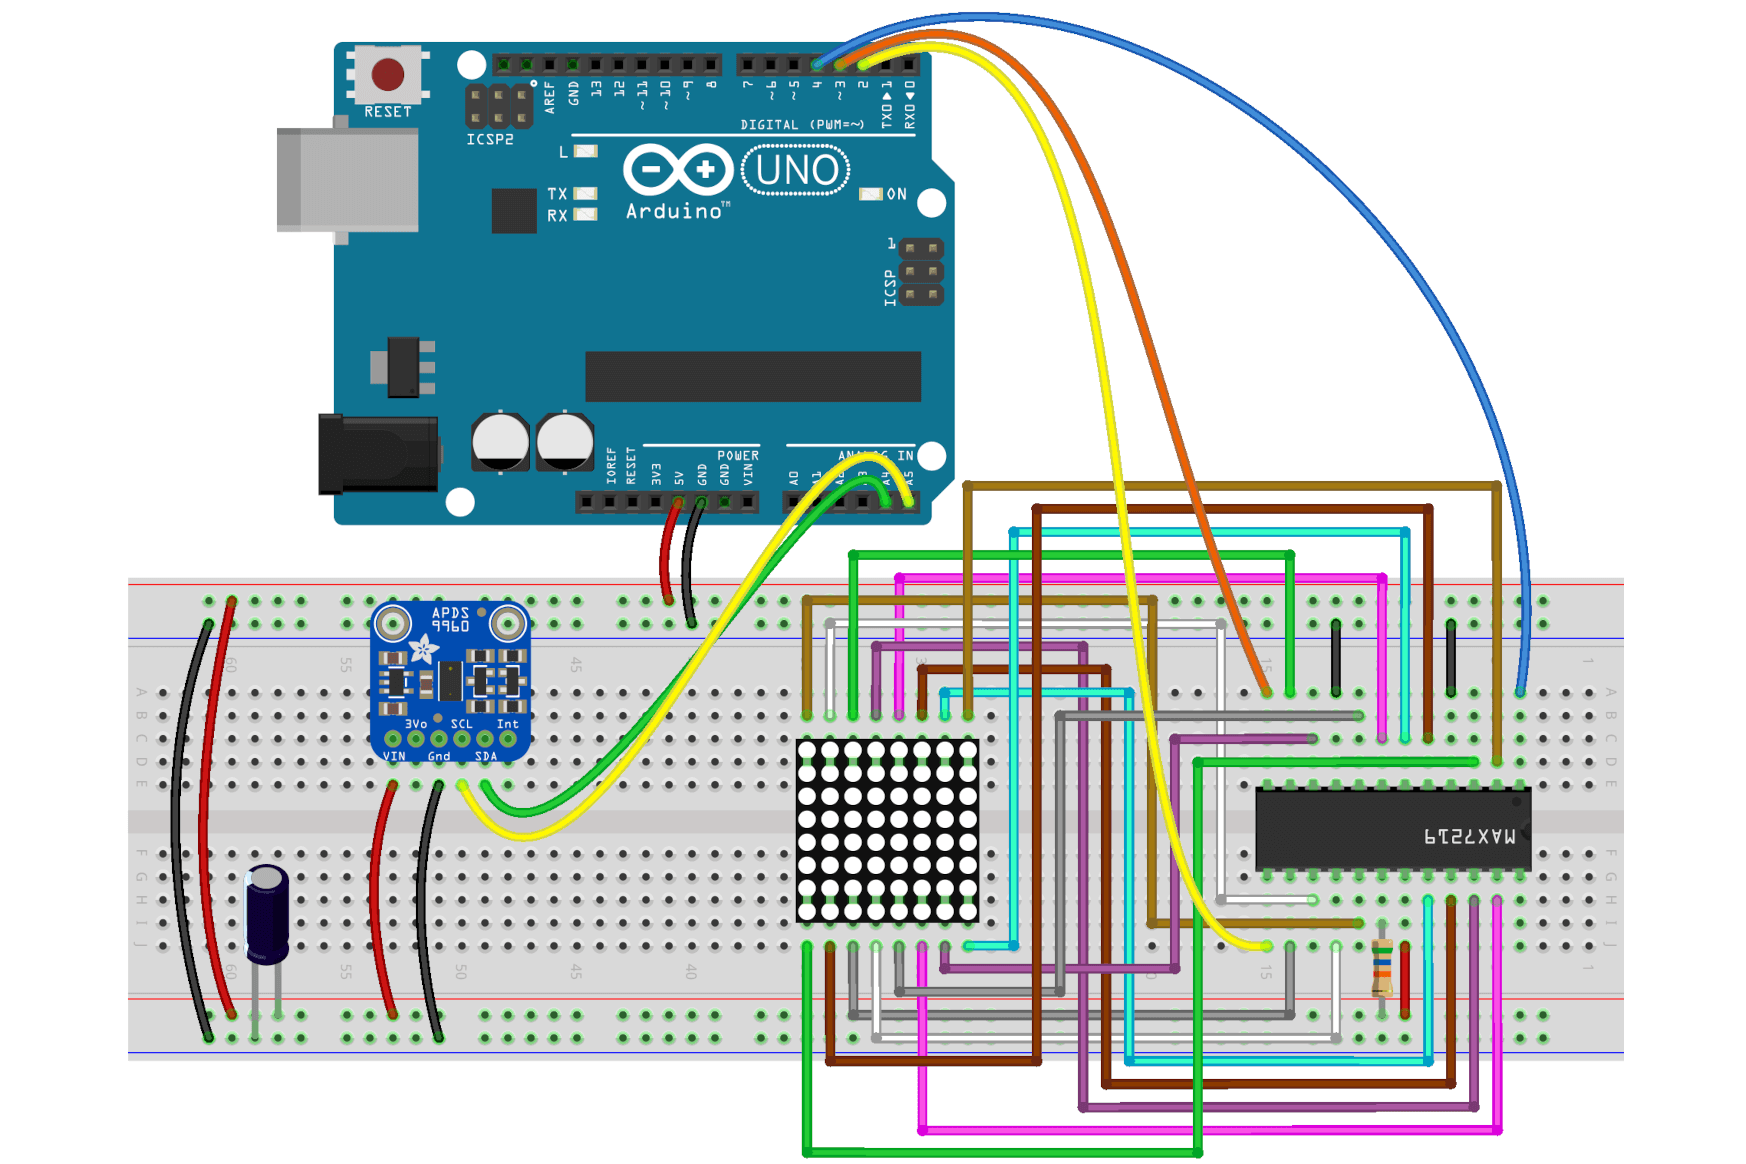
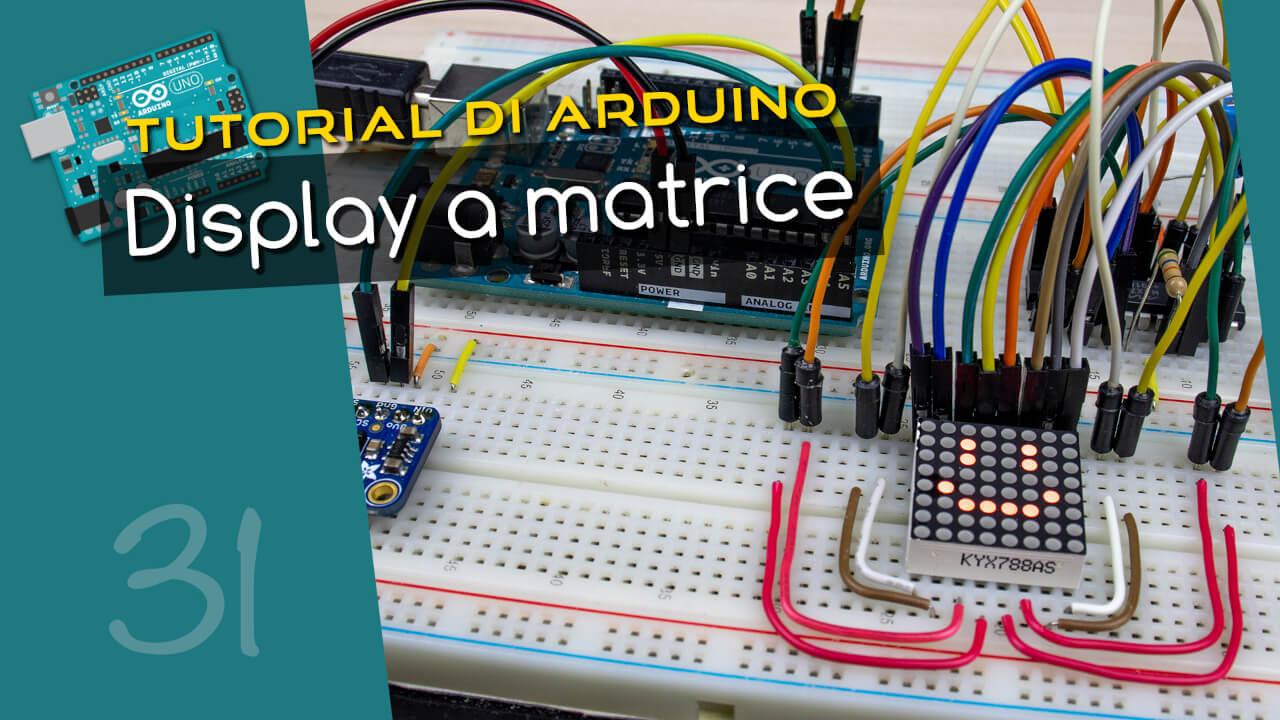
Puoi rendere i tuoi progetti con Arduino più vivaci e divertenti.
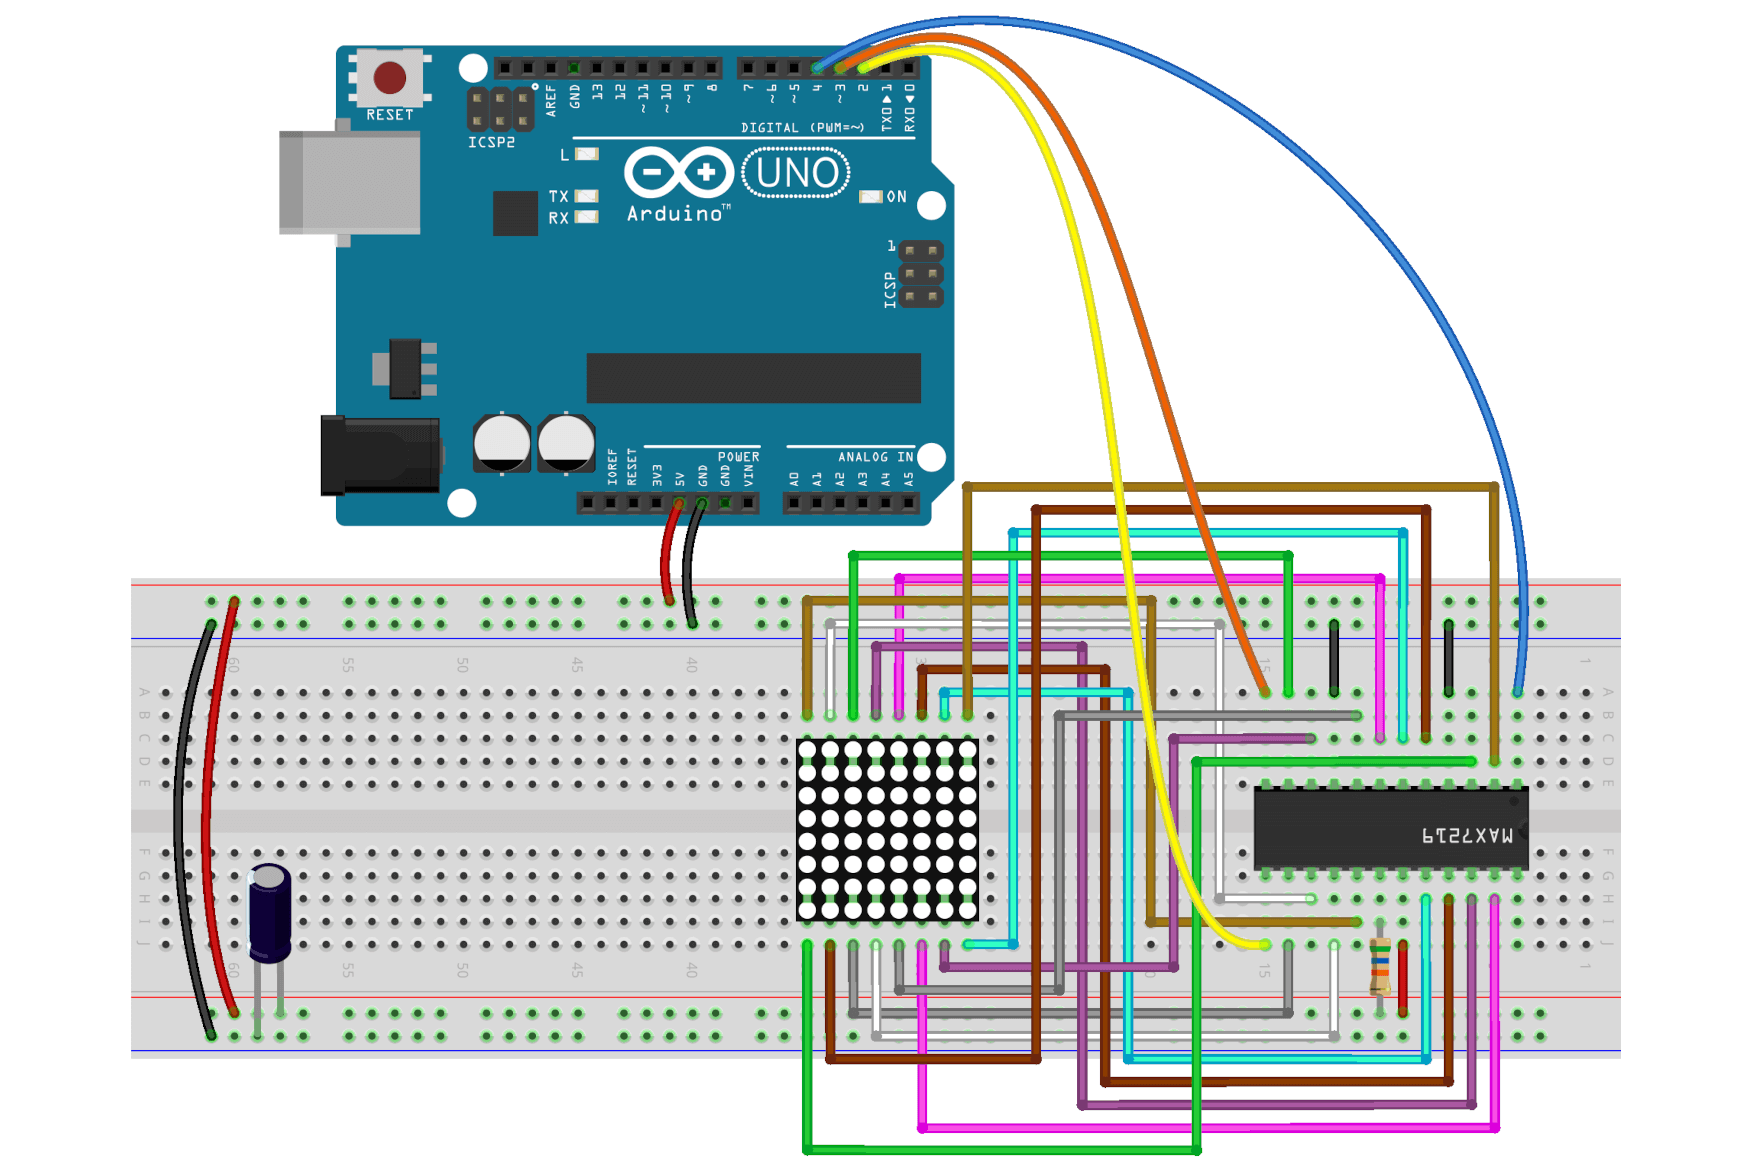
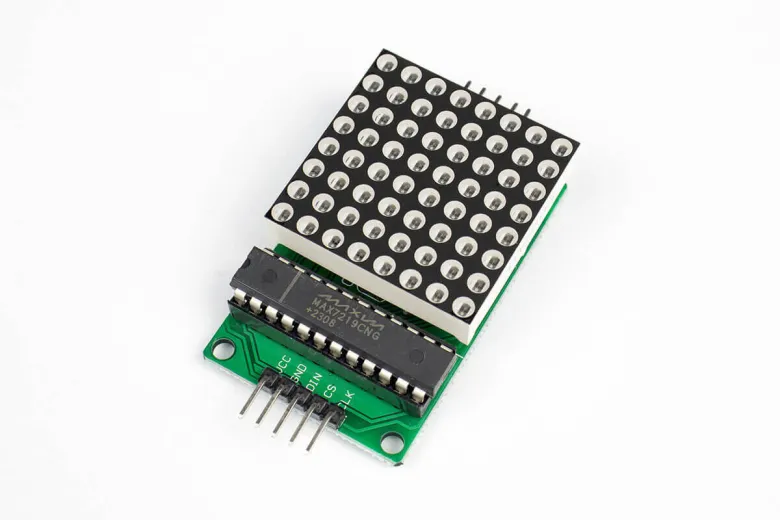
Seguendo questo video tutorial, scoprirai come visualizzare animazioni, testi e icone sul display a matrice 8x8. Imparerai come collegarlo al LED driver MAX7219 e come scrivere lo sketch per farlo funzionare.
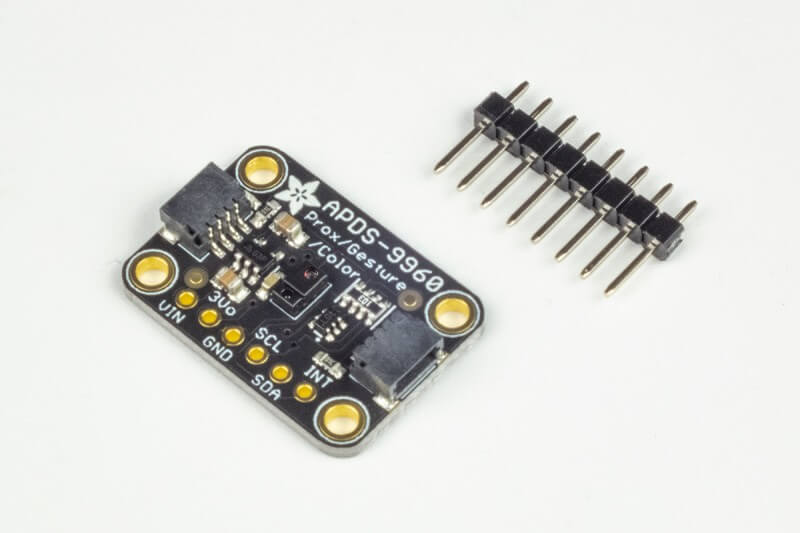
Inoltre, vedremo come comandarlo tramite un gesto della mano, utilizzando il sensore di gesti APDS9960.
#include <LedControl.h>#define DIN_PIN 4#define CLK_PIN 2#define LOAD_PIN 3 LedControl lc = LedControl(DIN_PIN, CLK_PIN, LOAD_PIN, 1); const byte IMAGES[][8] = { { 0b00000000, 0b00100100, 0b00100100, 0b00000000, 0b01000010, 0b00111100, 0b00000000, 0b00000000 }, { 0b00000000, 0b00100000, 0b00100000, 0b00000010, 0b01000100, 0b00111000, 0b00000000, 0b00000000 }};const int IMAGES_SIZE = sizeof(IMAGES) / 8; const uint64_t TEXT[] = { 0x6666667e66663c00, // A 0x66361e3e66663e00, // R 0x3e66666666663e00, // D 0x7c66666666666600, // U 0x3c18181818183c00, // I 0x666666767e6e6600, // N 0x3c66666666663c00 // O};const int TEXT_SIZE = sizeof(TEXT) / 8; void setup() { lc.shutdown(0, false); lc.setIntensity(0, 7); lc.clearDisplay(0);} void loop() { pixelAnimation(1000); rowColumnAnimation(1500); bitmapAnimation(1000); textAnimation(3500);} void pixelAnimation(unsigned long duration) { for (int i = 1; i >= 0; i--) { for (int j = 0; j < 8; j++) { if (j < 3) { lc.setLed(0, j+3, j, i); } else { lc.setLed(0, 7-j, j, i); } delay(duration / 16); } }} void rowColumnAnimation(unsigned long duration) { for (int i = 0; i < 8; i++) { lc.setRow(0, i, 0xFF); delay(duration / 16); } for (int i = 0; i < 8; i++) { lc.setColumn(0, i, 0x00); delay(duration / 16); }} void bitmapAnimation(unsigned long duration) { for (int i = 0; i < 3; i++) { for (int j = 0; j < 8; j++) { lc.setRow(0, j, IMAGES[i%IMAGES_SIZE][j]); } delay(duration / 4); } delay(duration / 4); lc.clearDisplay(0);} void textAnimation(unsigned long duration) { for (int i = 0; i < TEXT_SIZE; i++) { displayImage(TEXT[i]); delay(duration / TEXT_SIZE); } lc.clearDisplay(0);} void displayImage(uint64_t image) { for (int i = 0; i < 8; i++) { byte row = (image >> i * 8) & 0xFF; for (int j = 0; j < 8; j++) { lc.setLed(0, i, j, bitRead(row, j)); } }}
#include <LedControl.h>#include <Adafruit_APDS9960.h>#define DIN_PIN 4#define CLK_PIN 2#define LOAD_PIN 3#define ARROW_UP 0#define ARROW_DOWN 1#define ARROW_LEFT 2#define ARROW_RIGHT 3 LedControl lc = LedControl(DIN_PIN, CLK_PIN, LOAD_PIN, 1);Adafruit_APDS9960 apds; const uint64_t ARROWS[] = { 0x1c1c1c1c7f3e1c08, // ^ 0x081c3e7f1c1c1c1c, // v 0x00080cfefffe0c08, // < 0x0010307fff7f3010, // >};const int ARROWS_SIZE = sizeof(ARROWS) / 8; void setup() { lc.shutdown(0, false); lc.setIntensity(0, 7); lc.clearDisplay(0); apds.begin(); apds.enableProximity(true); apds.enableGesture(true);} void loop() { int gesture = apds.readGesture(); if (gesture) { updateDisplay(gesture); }} void updateDisplay(int gesture) { switch (gesture) { case APDS9960_UP: displayImage(ARROWS[ARROW_DOWN]); break; case APDS9960_DOWN: displayImage(ARROWS[ARROW_UP]); break; case APDS9960_LEFT: displayImage(ARROWS[ARROW_RIGHT]); break; case APDS9960_RIGHT: displayImage(ARROWS[ARROW_LEFT]); break; }} void displayImage(uint64_t image) { for (int i = 0; i < 8; i++) { byte row = (image >> i * 8) & 0xFF; for (int j = 0; j < 8; j++) { lc.setLed(0, i, j, bitRead(row, j)); } }}
In qualità di Affiliato Amazon riceviamo un guadagno dagli acquisti idonei